
 AI Document Summary
This document covers the SnowCloud Rental App for frontline team members. Login and account setup follow the same process as other SnowCloud applications. This guide focuses on rental-specific workflows.
NAVIGATING THE DASHBOARD #
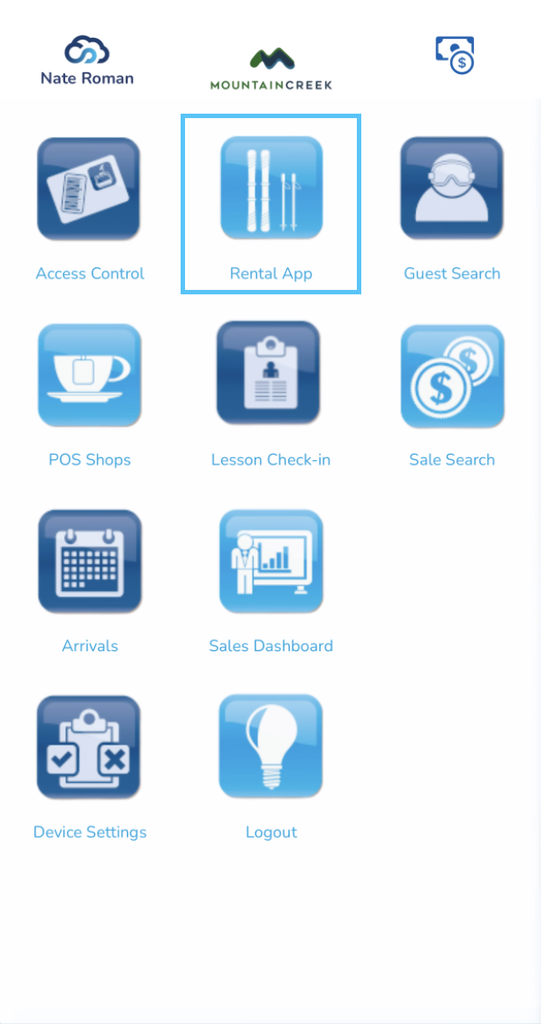
After logging in, the main dashboard displays all available SnowCloud applications as app icons. Depending on your location and role, you may see icons for POS Shops, Rentals, and other tools. Select the app relevant to your current assignment.
THE RENTAL APP — OVERVIEW #
Select the Rental app icon from the dashboard to open the rental fulfillment screen.
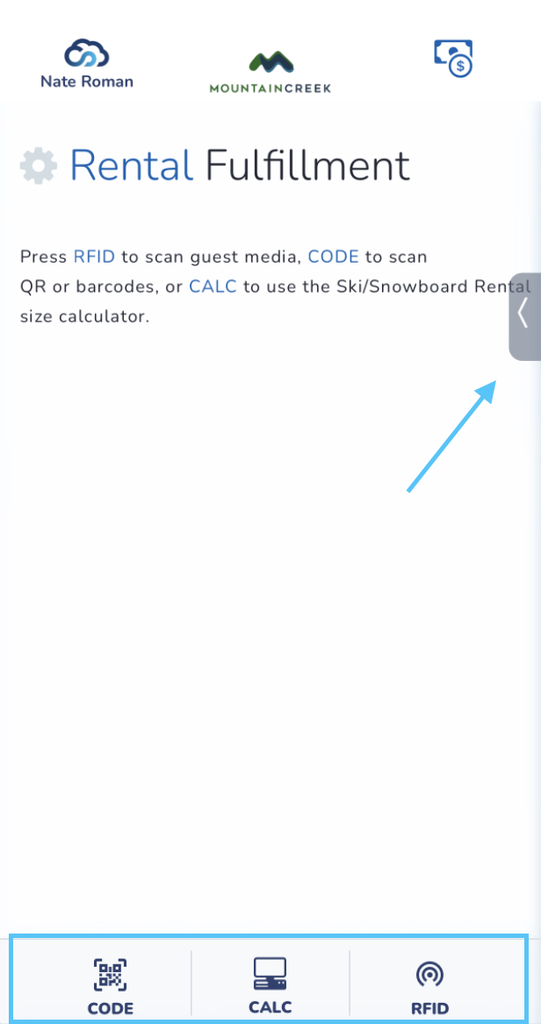
At the bottom of the screen you will see three function options:
- Code — Opens the barcode scanner. Used to scan the barcode on rental equipment for both signing items out to guests and checking items back in on return.
- Calc — Opens the equipment calculation tool. Used to determine the correct ski or snowboard settings based on guest measurements. See the Equipment Calculation Tool section for full details.
- RFID — Opens the guest media scanner. Used to pull up a guest’s profile and rental entitlements by scanning their pass. See the Guest Profile & Rental Entitlements section for full details.
EQUIPMENT CALCULATION TOOL #
Select Calc from the bottom of the rental fulfillment screen to open the calculation sheet.
The calculator supports both ski and snowboard setups. Use the toggle at the top to select the equipment type, then enter the guest’s information:
- Age Group
- Height
- Weight
- Shoe Type
- Shoe Size
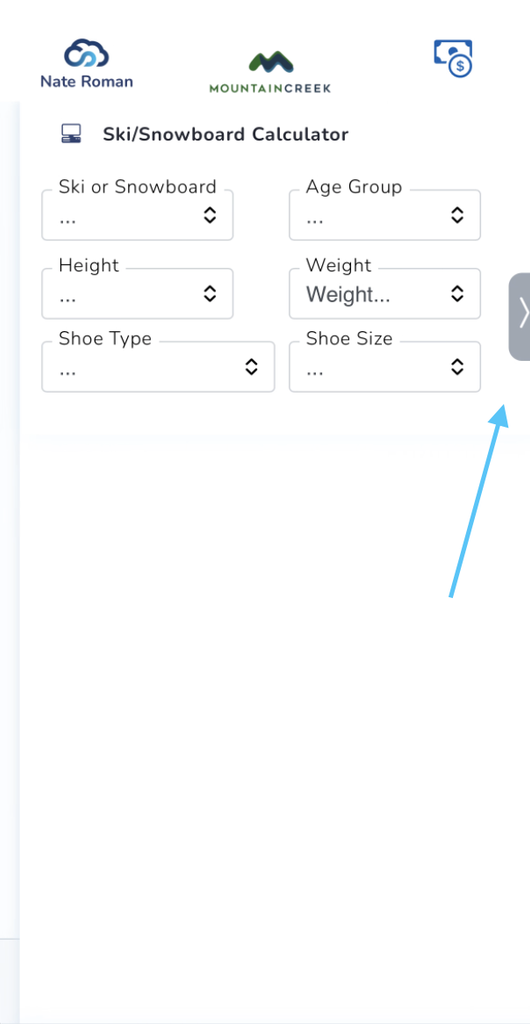
The tool will return the recommended equipment settings based on the values entered. Use these results to select and configure the appropriate rental equipment before scanning it out to the guest.
GUEST PROFILE & RENTAL ENTITLEMENTS #
Select RFID from the bottom of the rental fulfillment screen, then scan the guest’s pass to pull up their profile.
Rental Profile #
Once scanned, the guest’s rental profile will be displayed, showing their saved configuration including:
- Height
- Weight
- Gender
- Shoe Size
- Skill Level
Any of these fields can be updated by selecting the pencil icon next to the relevant field. Keeping this information current ensures accurate equipment setup on future visits.
To access the guest’s full profile, select the person icon next to their name.
Rental Entitlements #
Below the guest’s profile, you will see a list of all rental entitlements associated with their pass. Each entitlement represents a rental item they are eligible to receive. The status of each item will be displayed to the right.
SCANNING OUT RENTAL EQUIPMENT #
Once the guest’s profile is pulled up via RFID and their entitlements are visible:
- Locate the rental item in the entitlements list
- Select Scan Out to the right of the item
- A red targeting square will appear on screen
- Scan the barcode on the physical rental equipment
- The item will be assigned to the guest and the status will update to Issued
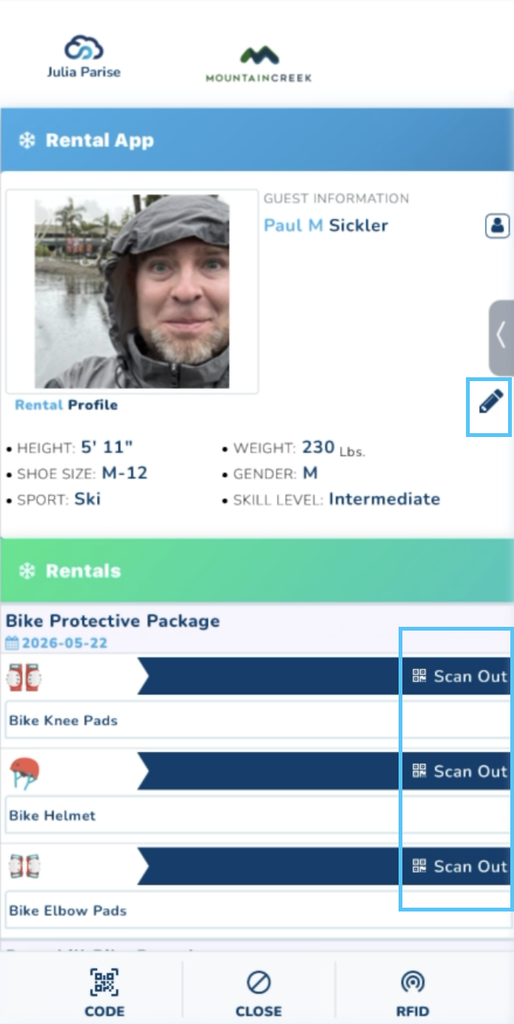
Repeat this process for each item the guest is entitled to receive.
RETURNING RENTAL EQUIPMENT #
Returning equipment does not require scanning the guest’s pass. The return process is initiated directly through the barcode scanner.
To return an item:
- Open the Rental App from the dashboard
- Select Code at the bottom of the screen
- Scan the barcode on the returned equipment or toggle on “Enable consecutive check-in” by pressing the settings cog icon on the rental fulfillment screen and start scanning the equipment back in
- You will be prompted to confirm the return and check the item back into inventory
- Confirm to complete the return cycle
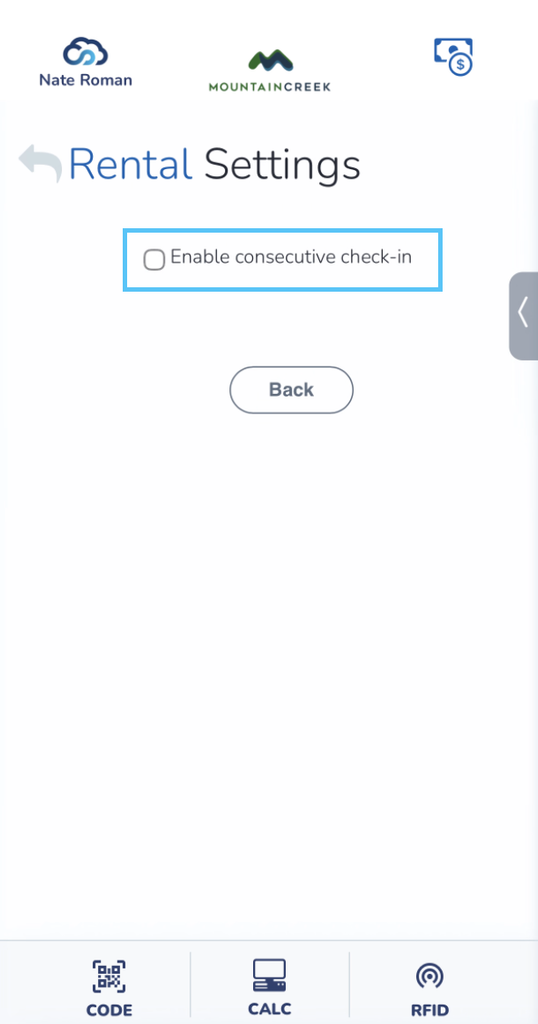
The item will be marked as returned and inventory will be updated accordingly.