
 AI Document Summary
This document is intended to help operations teams understand SnowCloud’s retail POS capabilities and build internal SOPs tailored to their specific workflows.
CONFIGURING PAYMENT OPTIONS #
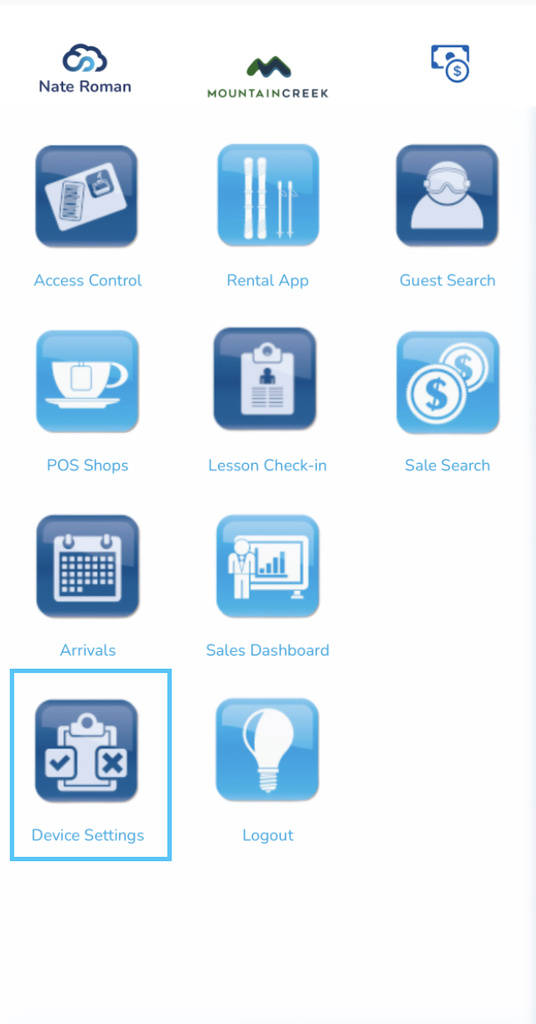
Payment options are configured in Device Settings upon first login. This step ensures the correct card reader or tap-to-pay method is assigned to the device before processing any transactions.
Available payment methods:
- Pay on Phone — tap-to-pay via the device
- Pay on Card Reader (RS700) — select the correct RS700 device number assigned to your station
NAVIGATING THE INTERFACE #
Home Screen #
After payments are set up, press the cloud icon in the top-left to return to the home screen. Press the POS Shops icon on the main page to navigate to the list of shops, then choose your desired location.
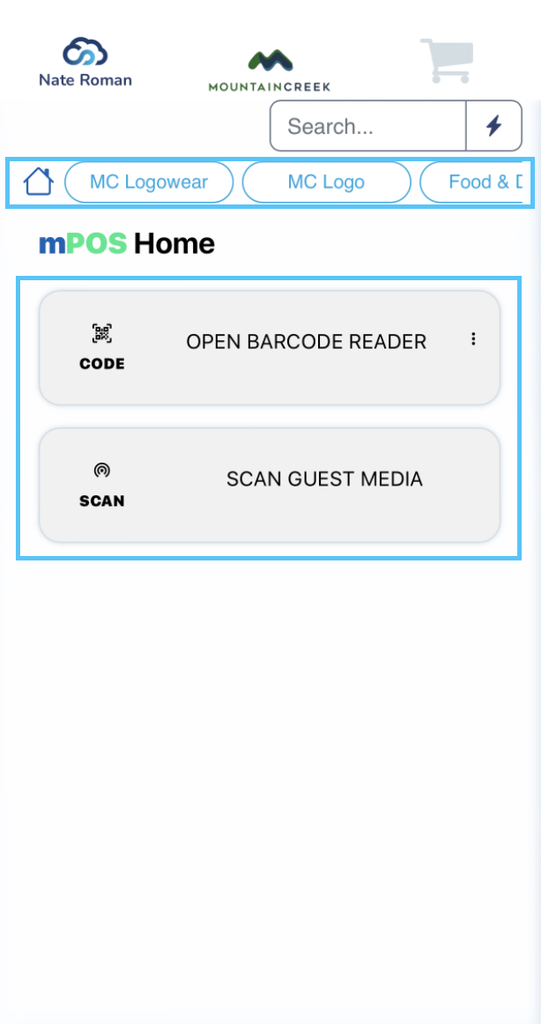
The main landing page provides quick access to the two most common actions:
- Open Barcode Reader — scan items directly into a cart
- Scan Guest Media — attach a guest profile to the current sale before or during checkout
- Quick Menu Tabs — configurable shortcut menus at the top of the screen (e.g., Favorites, Apparel, Accessories) for frequently sold items that can be added without scanning
Side Menu #
Select the SnowCloud logo with the current user’s name in the upper-left corner to open the side menu. Options include:
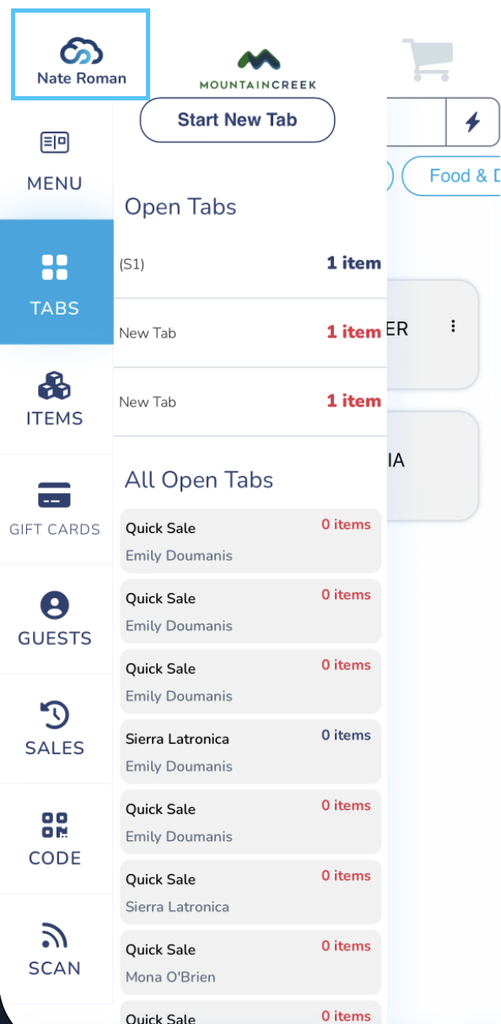
- Menu — view session information including the user’s name, shop location, and session start time. Also used to exit the current shop or end the session when all tabs are closed.
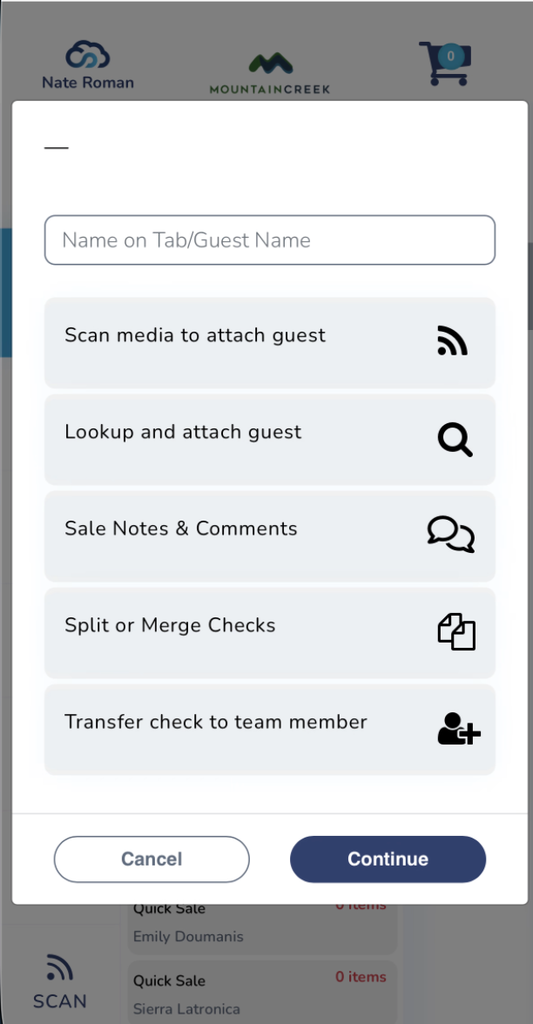
- Tabs — start a new tab or manage open tabs. From within a tab, team members can:
- Attach a guest by scanning their pass
- Attach a guest by manual lookup
- Add sale notes and comments
- Split or merge checks by line item
- Transfer the check to another team member
- Items — search for products by name, barcode, or SKU. Useful when a barcode is unavailable or damaged.
- Gift Cards — displays a configurable landing page of available gift card denominations (e.g., $50, $100, $250). Denominations are set by the operator and can be adjusted to fit the operation.
- Guest Lookup — search the guest database by name, phone number, or email to associate a guest profile with a sale.
- Sales / Order Lookup — search closed transactions by guest name, phone number, email, last four digits of a card, or sale code. Used for pulling up receipts or locating past orders for exchanges and refunds.
- Code — a secondary entry point to the barcode reader. Scan items into the cart by placing them within the red targeting square. If no tab is open, items are placed in a temporary cart.
- Scan — a secondary option to scan guest media. Attaches the guest to the current sale and automatically applies any eligible discounts.
STARTING A SALE #
SnowCloud is a paperless system — guests receive receipts by email or through their guest profile. Attaching a guest profile at the start of a sale allows for automatic receipts, faster refunds, and automatic discount application.
Workflow Example:
- Ask the guest if they have a pass or account
- Open the Tabs menu and start a new tab
- Attach the guest by scanning their pass or using the Guest Lookup function
- Proceed to add items
Checks can still be opened and completed without a guest profile attached. If no profile is linked, receipts can be emailed manually at checkout.
ADDING ITEMS TO THE CART #
Items can be added to the cart using any of the following methods:
- Barcode Scanner — scan the item barcode using the built-in reader or the Code menu option. This is the primary and most efficient method for most retail operations.
- Quick Menu Tabs — select items from configurable category menus at the top of the home screen
- Items Search — look up a product by name, barcode, or SKU through the Items section of the side menu
CART & CHECKOUT #
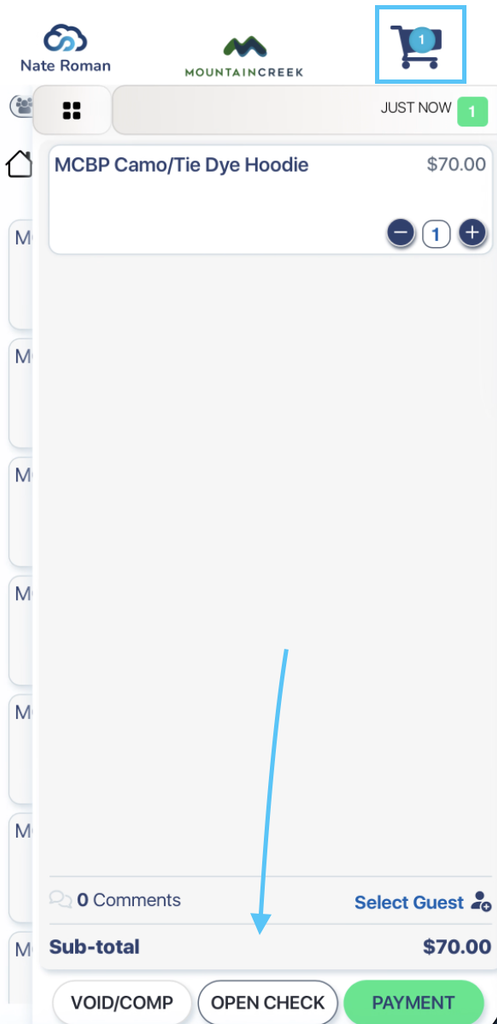
Open the cart by selecting the cart icon in the upper-right corner. The cart displays all line items with individual prices and quantity controls.
Cart options:
- Quantity Controls — increase or decrease the quantity of any line item directly in the cart
- Select Guest — attach a guest profile to the sale if not already done
- Void / Comp — discard the order or apply a comp (see Void & Comp section)
- Open Check — opens a sub-menu with the following functions:
- Scan to attach guest media
- Look up and attach a guest
- Add sale notes and comments
- Split or merge checks by line item
- Transfer check to another team member
- Payment — proceed to checkout
Notes & Comments #
Notes can be added through the Open Check menu to document relevant guest experience details. Notes are not visible to guests but are accessible in the web portal and should remain professional.
Discounts #
Automatic discounts (employee, passholder, etc.) apply when guest media is scanned. Managers can also apply manual discounts by percentage or dollar amount.
PROCESSING PAYMENT #
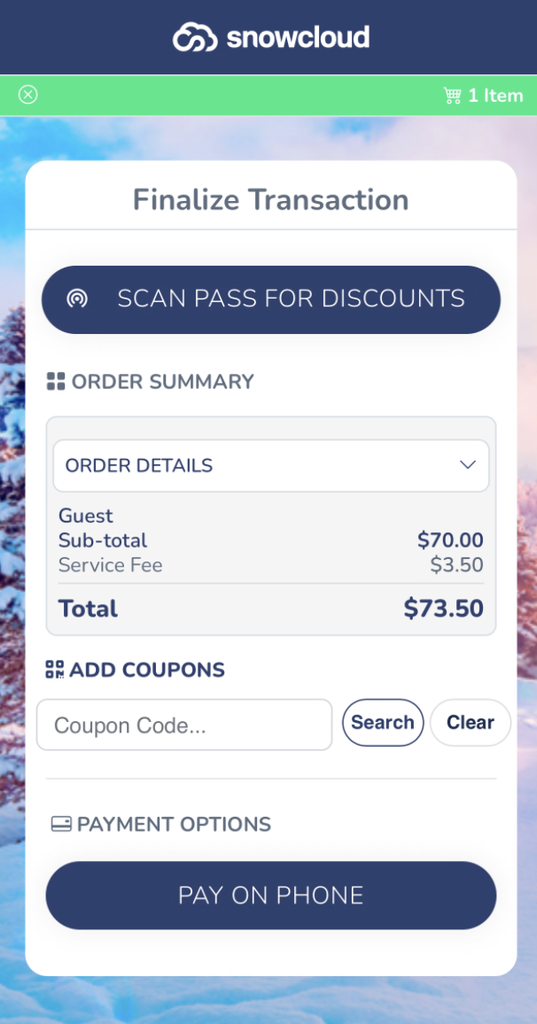
Select Payment from the cart to proceed.
Before completing payment:
- Confirm all items and quantities are correct
- Confirm any applicable discounts have been applied
- Ensure the guest profile is attached if the guest wants an emailed receipt
Payment options:
- Pay on Phone — tap-to-pay using the device
- Pay on Card Reader (RS700) — select the correct device number assigned to the station
- Cash
Receipt delivery:
- Guests linked to a profile automatically receive an emailed receipt
- If no profile is attached, a receipt can still be emailed manually at the final transaction screen
Since the system is paperless, always ask the guest if they would like an emailed receipt before they leave.
If need you can press the little x in the top let corner to return to the previous screen
VOID & COMP #
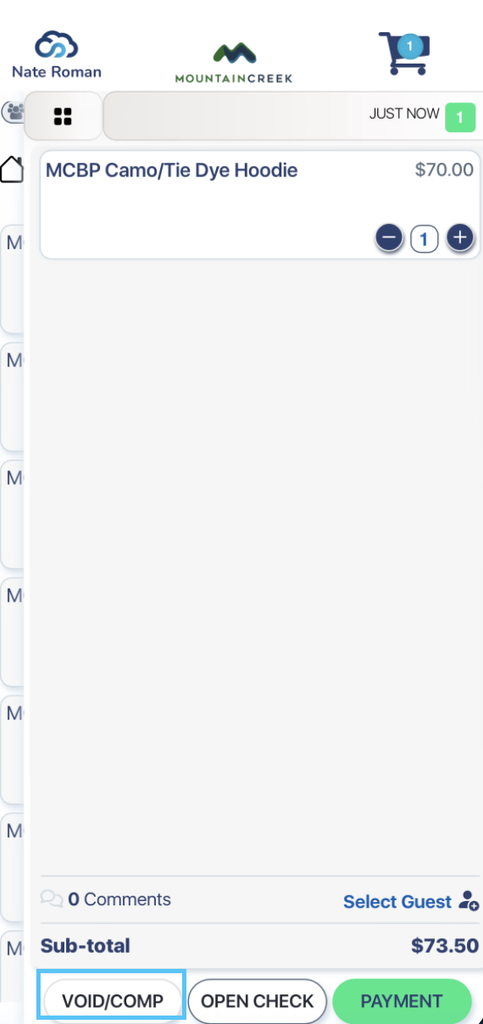
Void and comp functions are accessible through the cart icon.
Team members may void:
- Entire unused checks
- Items that have not yet been processed
Managers or leads are required to void or comp:
- Any transaction or item that has already been processed or paid
RETAIL EXCHANGES/REFUNDS #
Retail exchanges are normally a process managed by a supervisor who has backend access.
Process:
- Manager locates the original transaction in the web portal using the Sales / Order Lookup function
- Manager refunds the original item
- The replacement item is re-rung as a new check
Each size has a unique SKU. Accurate item selection during the exchange is critical for inventory replenishment. Exchanges should never be processed by manually adjusting quantities — each transaction must be completed as a separate refund and new sale.