AI Document Summary
This document covers the setup workflow for gift cards in SnowCloud, including creating gift card products, building your gift card shop menu, and taking the shop online.
If you are setting up SnowCloud for the first time and have existing gift cards from a previous platform, contact your SnowCloud point of contact about importing those balances before going live.
CREATING GIFT CARD PRODUCTS #
To create a gift card product:
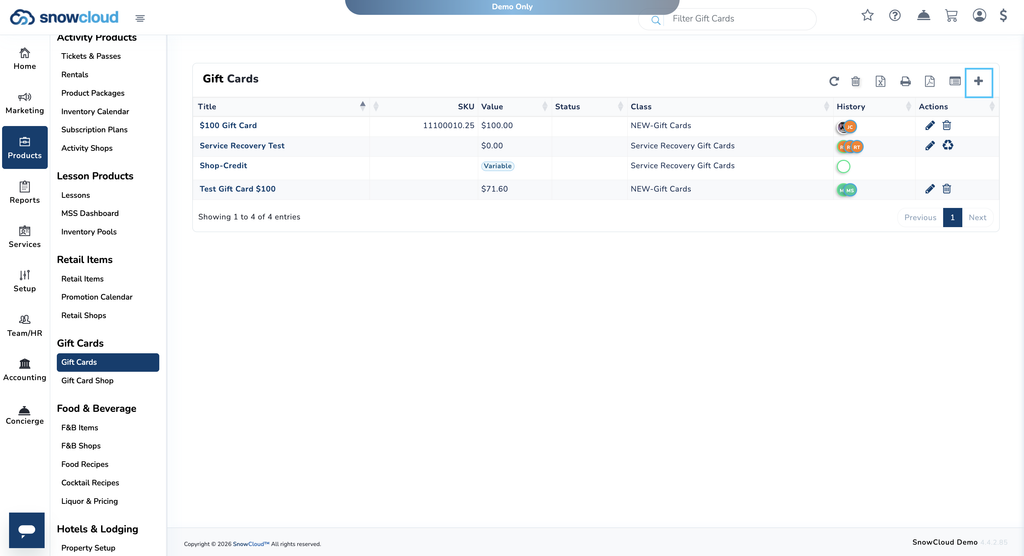
- From the left-side menu, select Products
- Select Gift Cards
- Press the plus (+) button in the top-right corner
- Fill in the following fields:
- Card Title
- SKU
- Description (if needed)
- Gift Card Account Classification
- Set a price for this card value
- Save the gift card
Repeat this process for each gift card denomination you offer.
SETTING UP THE GIFT CARD SHOP #
Online Menu #
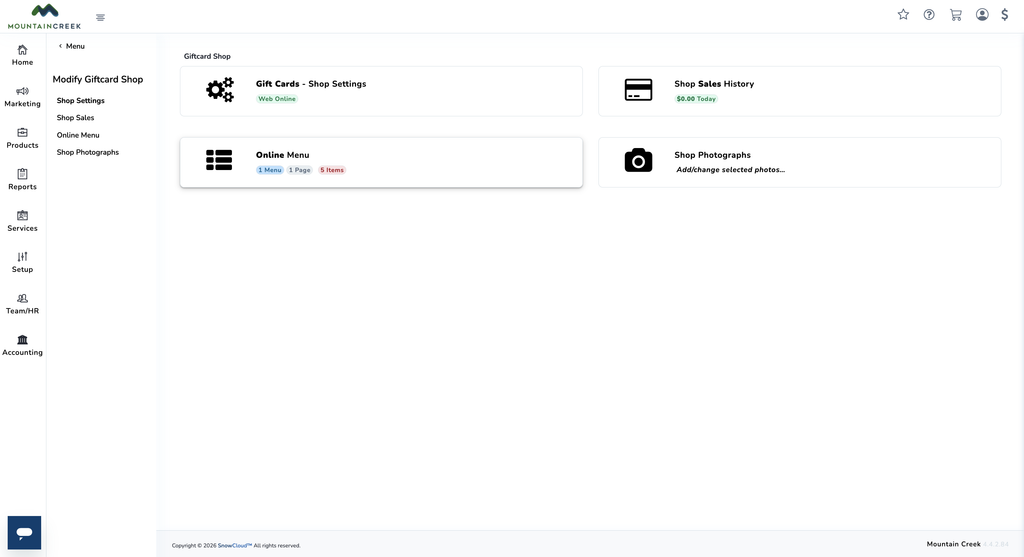
- From the left-side menu, select Products, then Gift Card Shop
- Select Online Menu
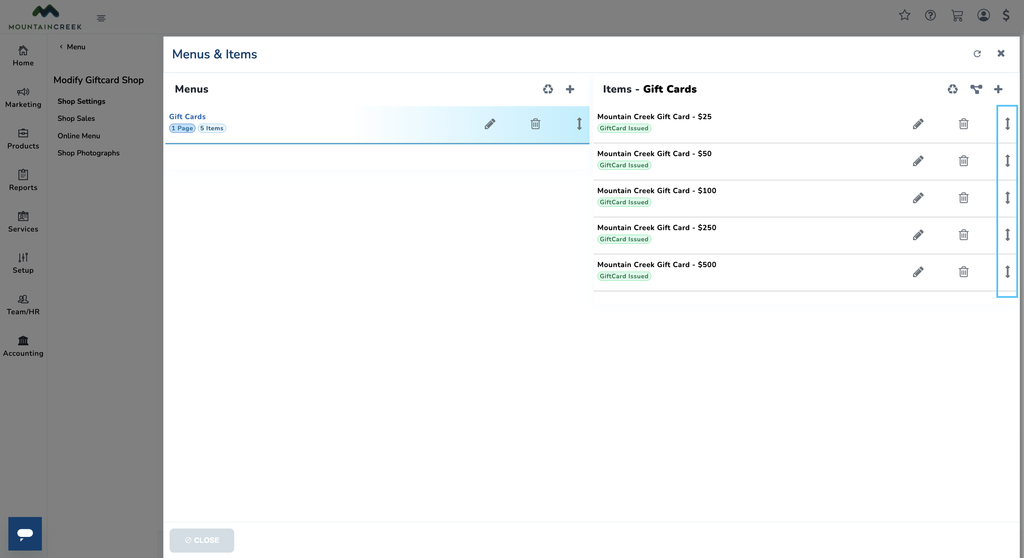
- Create a new menu — name it something like “Gift Cards”
- If you want to organize gift cards into categories, add sub-menus here. These will appear as selectable options on your eStore
- Select the Items menu in the top-right corner to add the gift card products you created in the previous step
- Use the up and down arrow sliders to drag and reorder your gift cards in any order
Shop Photographs #
Select Shop Photographs and upload an image to display for your gift card shop on the eStore.
Shop Settings #
- Select Shop Settings
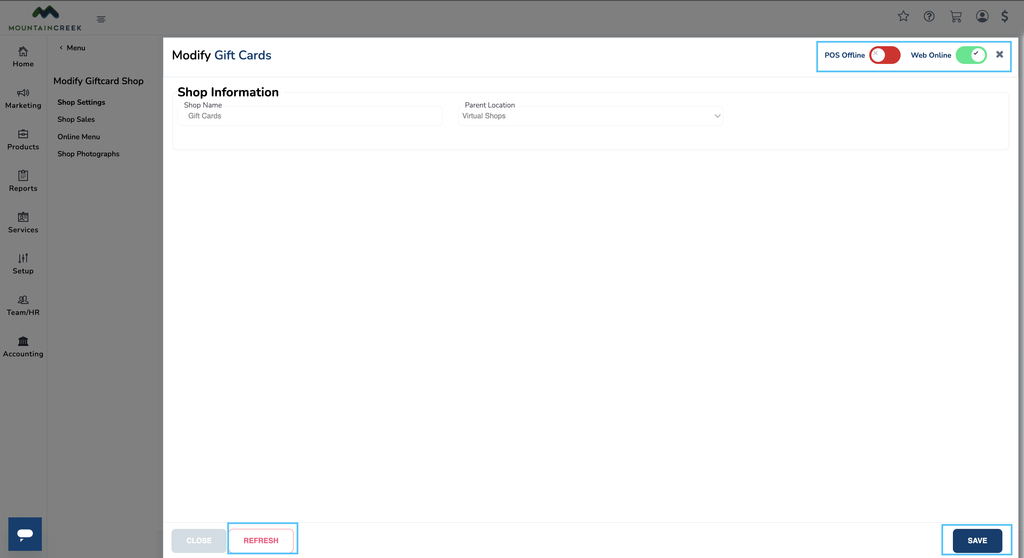
- In the top-right corner, toggle on POS and Web Online to make the shop active
- Select Save in the bottom-right corner
- Select Refresh in the bottom-left corner to apply the changes