
 AI Document Summary
This document covers the back-end portal workflow for configuring rental inventory, product classifications, and rental products in SnowCloud. It walks operations and customer success teams through building out a complete rental offering from fleet setup through to eStore-ready products.
Building Your Rental Fleet #
The Rental Fleet is where your physical inventory is entered into SnowCloud. Each item in your fleet is entered here before any rental products can be built.
To navigate to Rental Fleet:
- From the left-side menu, select Setup
- Under Rental Inventory, select Rental Fleet
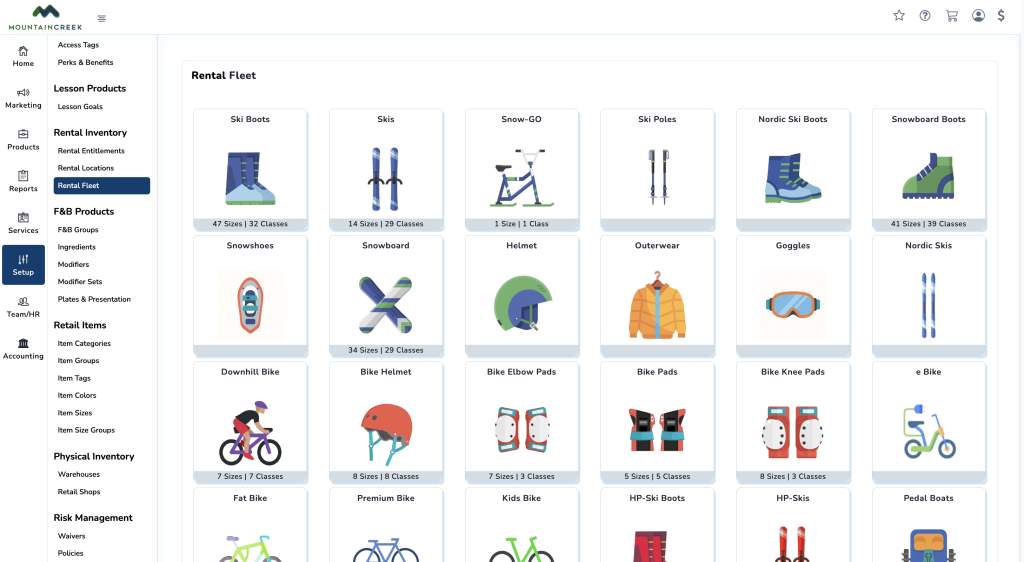
You will see all available fleet categories within SnowCloud.
To add fleet inventory:
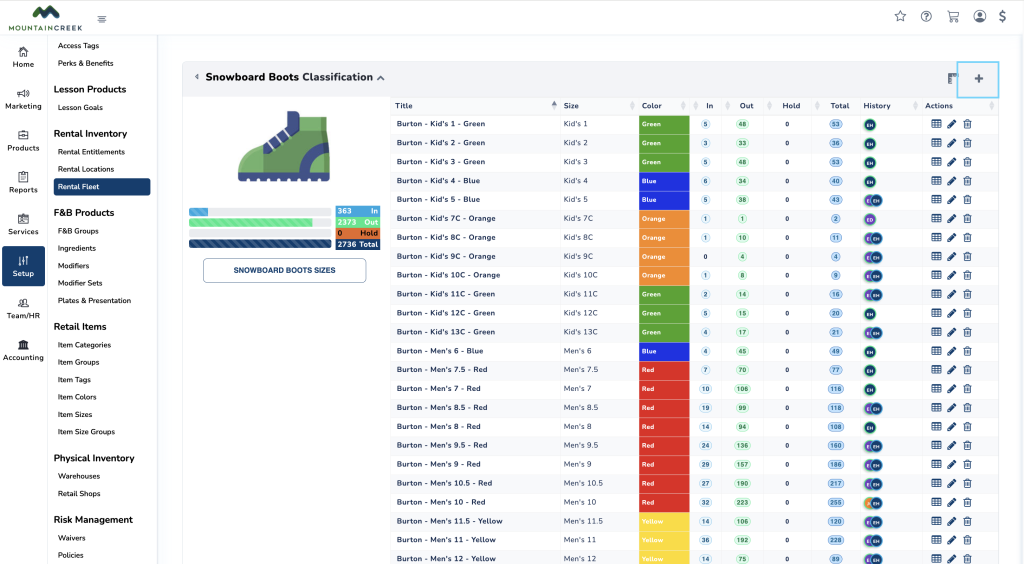
- Select the fleet category you want to populate (for example, Snowboard Boots)
- You will be brought to the inventory screen for that category
- Press the plus (+) button in the top-right corner
- Fill in the following fields:
- Vendor
- Color
- Title
- Size Group
- Select Save and Continue
Repeat this process for each item in your fleet — skis, ski boots, snowboards, or any other rental equipment available at your operation.
Creating Rental Product Classifications #
Rental product classifications categorize your rental products for accounting and reporting purposes. Each classification is tied to a GL code and can be configured to capture specific guest information at the time of rental.
To navigate to Rental Product Classifications:
- From the left-side menu, select Accounting
- Under Product Classification, select Rental Products
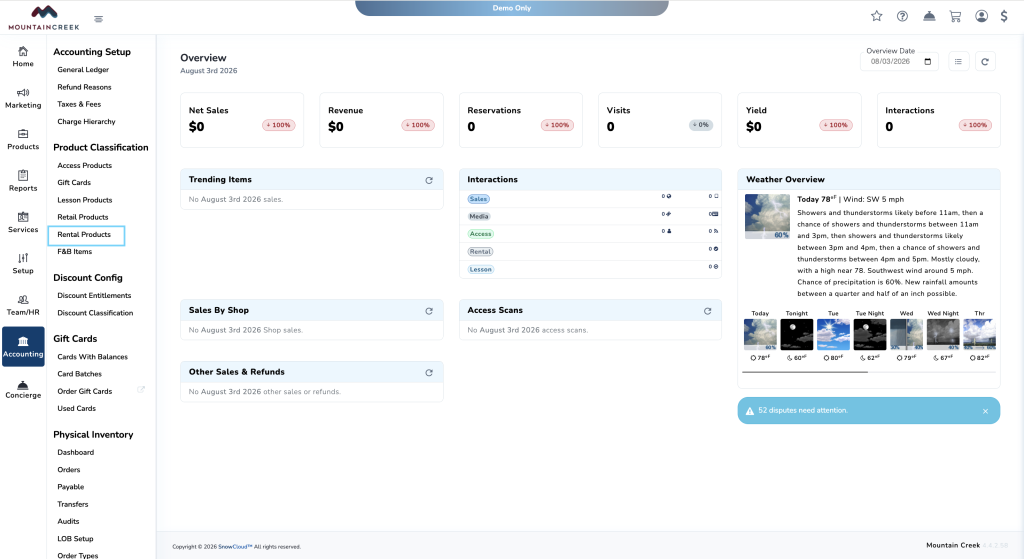
To create a rental product classification:
- Press the plus (+) button in the top-right corner
- Fill in the following fields:
- Season
- Activities
- Class Title
- Revenue GL Code
- Description (optional)
- Pass-along Credit Card & SnowPay Fee (CCSP) to Consumer (optional) — enable to pass processing fees to the guest at checkout
- Select Save and Close
You will be brought to a configuration screen where you can:
- Select what guest information is required for this rental classification (for example, height, weight, boot size)
- Defer revenue to a different GL account if needed
Creating Rental Products #
Rental products are the individual items guests will select and purchase. Each product is built from the fleet inventory and classifications configured in the previous steps.
To navigate to Rental Products:
- From the left-side menu, select Products
- Select Rentals
To create a rental product:
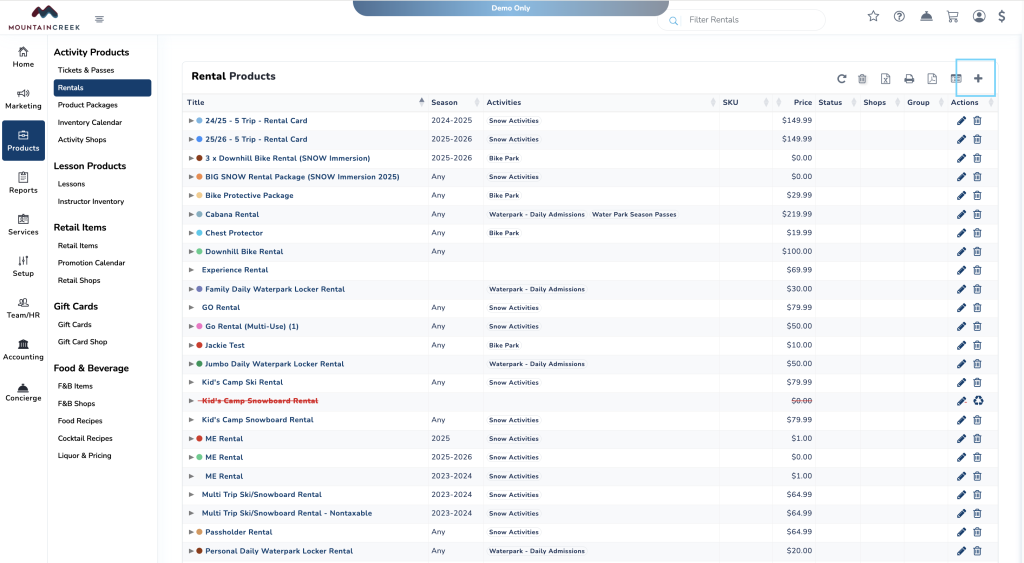
- Press the plus (+) button in the top-right corner
- Fill in the following fields:
- Item Name
- Season
- Activities
- SKU
- Accounting Classification
- Rental Entitlement
- Uses
- Inventory Method — select Calendar Only
- Description
- Ages
- Pricing
- Select Save and Add New Item
You will be brought to the product configuration screen, where you can make further adjustments and upload product photos that will display on the eStore.
Repeat this process for each rental product in your offering.