
 AI Document Summary
This document covers the back-end portal workflow for onboarding new team members in SnowCloud. It walks operations and HR teams through creating team classifications, building team discounts and team access entitlements, inviting new team members to the system, and configuring their roles and permissions.
NAVIGATING TO TEAM CLASSIFICATIONS #
Team classifications, discounts, access entitlements, and team member records are all managed under the Team/HR section of the portal.
To open the team classifications menu:
- From the left-side menu, select Team/HR
- Navigate to Team and Security
- Select Team Classifications
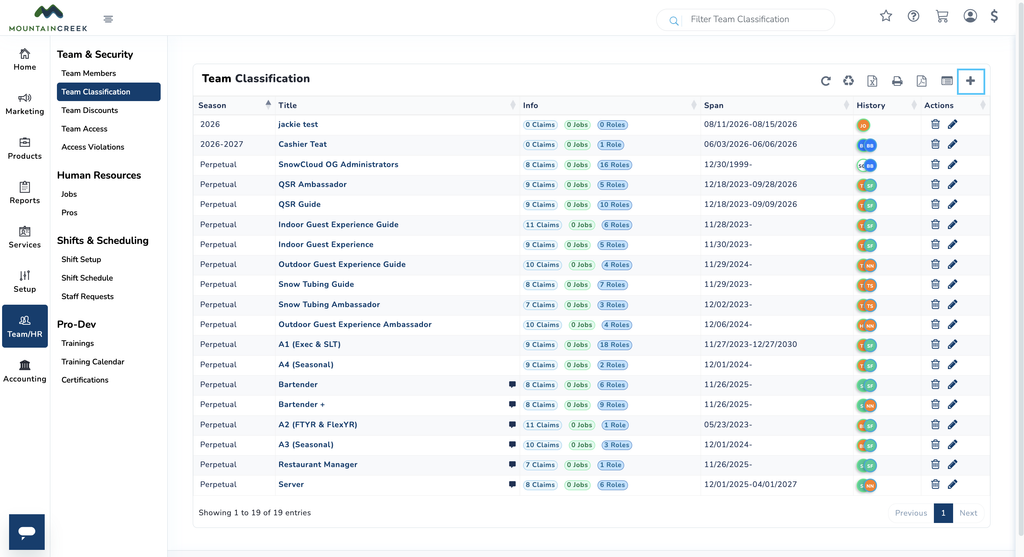
You will land on the team classifications page, where all existing positions are listed and new ones can be created.
CREATING A TEAM CLASSIFICATION #
A Team Classification represents a position within the system that team members will eventually be assigned to. Each classification carries its own set of permissions, entitlements, and role assignments that determine what an assigned team member can do.
To create a team classification:
- From the Team Classifications page, press the plus (+) button in the top-right corner
- Fill in the following fields:
- Season
- Effective Date
- Expiration Date
- Classification Type — select one of the following:
- Employee
- Manager
- Administrative
- Classification Title — the name of the position being created
- Professional Designation (if applicable)
- Description
- Select Save and Create New
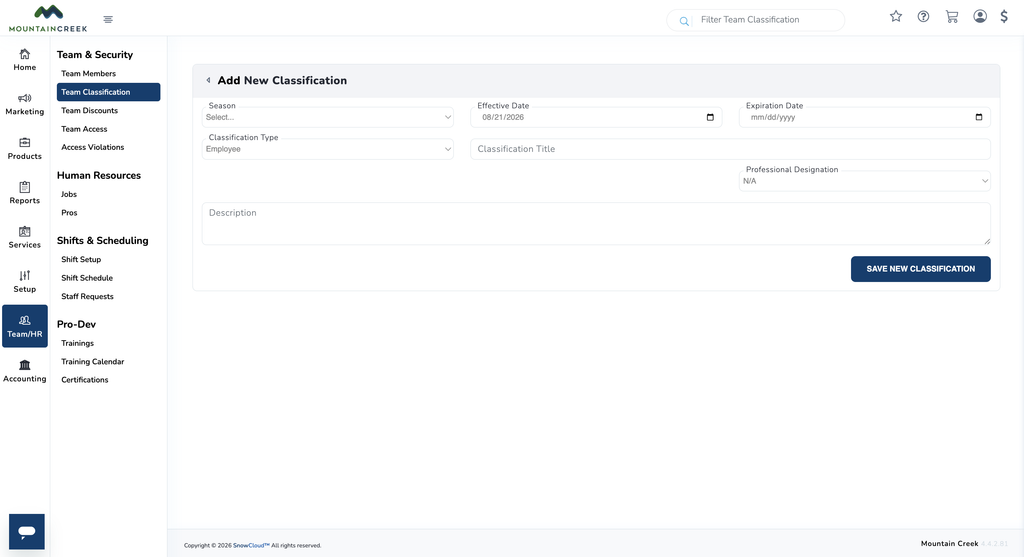
Once saved, you will be brought to the configuration screen where entitlements, roles, and permissions can be applied.
CONFIGURING ENTITLEMENTS, ROLES & PERMISSIONS #
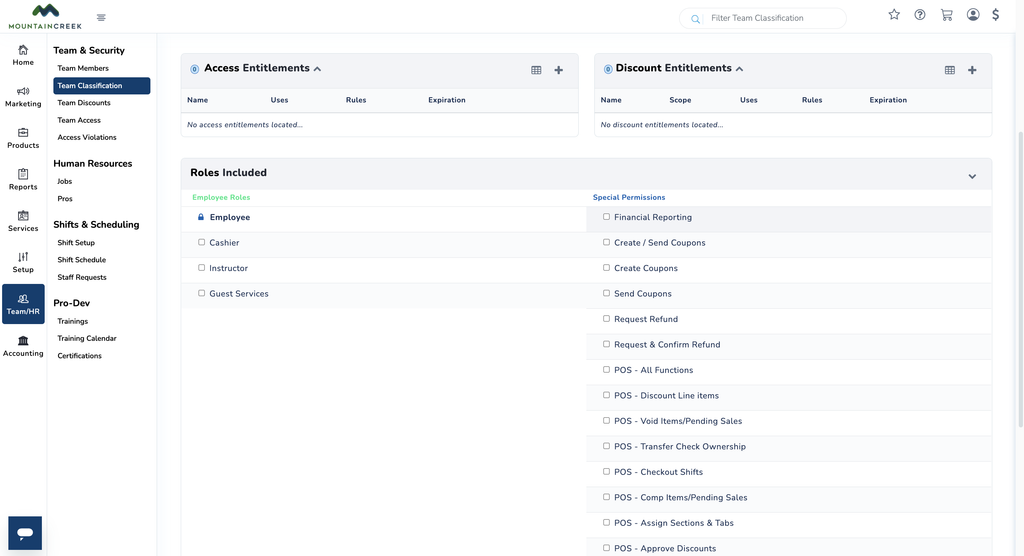
After saving a new classification, the configuration screen allows you to attach entitlements and define the roles and permissions tied to the position.
Access & Discount Entitlements #
Two boxes with a plus (+) icon are available for attaching entitlements from your existing library:
- Access Entitlements — select from previously created team access entitlements
- Discount Entitlements — select from previously created team discounts
Roles Included #
The Roles Included box defines the general role assignments tied to this classification. The base role is locked as Employee, but additional roles can be added to define the specific function of the position.
Examples of additional roles:
- Cashier
- Instructor
- Guest Services
Special Permissions #
The Special Permissions category is located to the right of the roles section. This area allows you to grant specific portal and app functions to the classification beyond the base role.
Examples of special permissions:
- Financial / Reporting Access
- Create and Send Coupons
- Request Refund
- POS Functionalities
CREATING TEAM DISCOUNTS #
Team Discounts are discount entitlements specifically designed for team member use. They function the same as standard discount entitlements but are categorized separately for team-specific assignment.
To create a team discount:
- From the left-side menu, select Team/HR
- Navigate to Team and Security and select Team Discounts
- Press the plus (+) button in the top-right corner
- Fill in the following fields:
- Season
- Discount Contra GL
- Entitlement Name
- Included Uses (daily uses, if limited)
- Description
- Save the new team discount
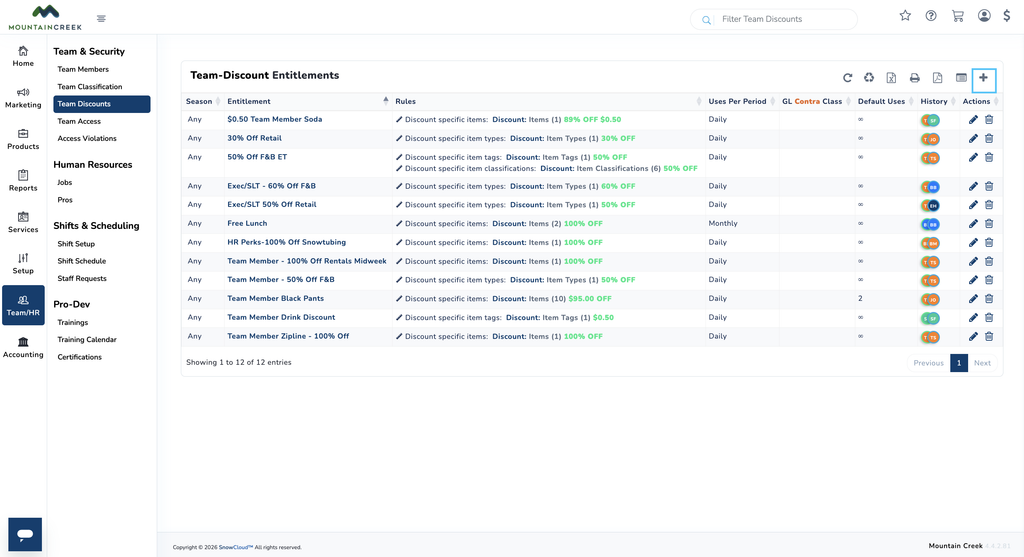
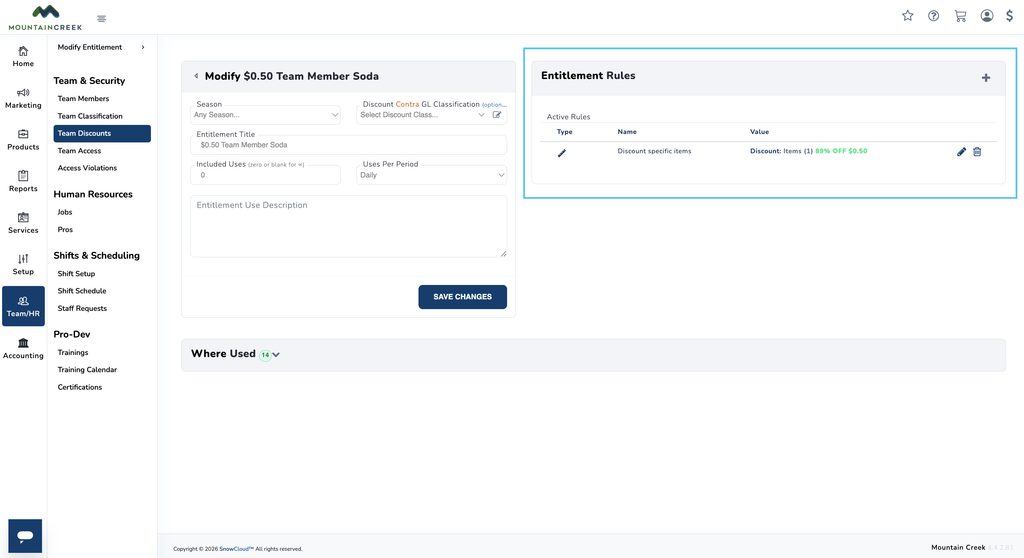
Once created, the team discount becomes available to attach to a team classification through the configuration screen described in the Configuring Entitlements, Roles & Permissions section.
CREATING TEAM ACCESS ENTITLEMENTS #
Team Access Entitlements define how a team member’s access functions — what the entitlement is entitled to and when those entitlements are valid. They follow the same structure as standard access entitlements but are categorized separately for team-specific assignment.
To create a team access entitlement:
- From the left-side menu, select Team/HR
- Navigate to Team and Security and select Team Access
- Press the plus (+) button in the top-right corner
- Fill in the following fields:
- Season (e.g., 2026)
- Entitlement Name
- Included Uses (if limited)
- Select Save and Add Rules
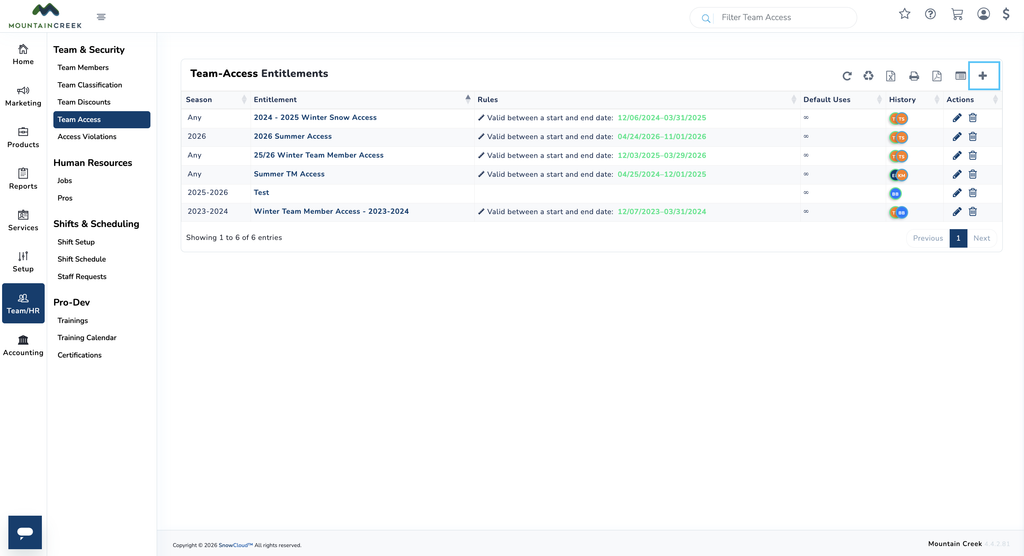
Once saved, you will be brought to a configuration screen where specific rules can be added.
Example — Team Season Pass, Season 2023:
- Valid between start date 11/23/2023 and end date 03/31/2024
Example — 10 Day Team Bike Pass, 2026:
- Invalid between start and end date: 04/25/2026–04/26/2026
- Valid between start and end time: 9:00 AM–6:00 PM
- Allow access at points: (1) Specific Locations
- Valid between start and end date: 04/20/2026–05/20/2026
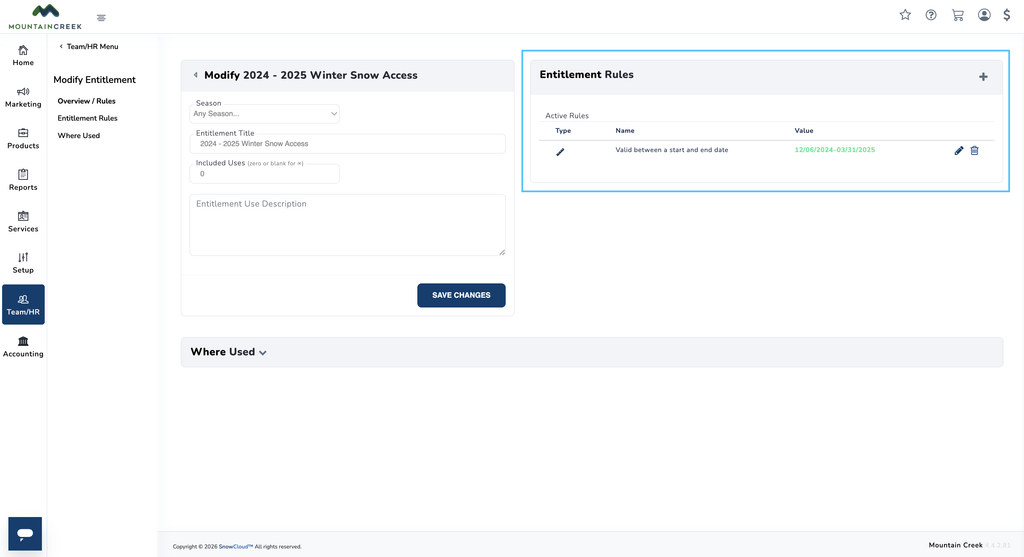
Once created, the team access entitlement becomes available to attach to a team classification through the configuration screen described in the Configuring Entitlements, Roles & Permissions section.
INVITING A NEW TEAM MEMBER #
The final step in onboarding is creating the individual team member record and sending an invitation to sign up.
To invite a new team member:
- From the left-side menu, select Team/HR
- Navigate to Team and Security and select Team Members
- Press the plus (+) button in the top-right corner
- Enter the team member’s email address
- Save to send the invitation
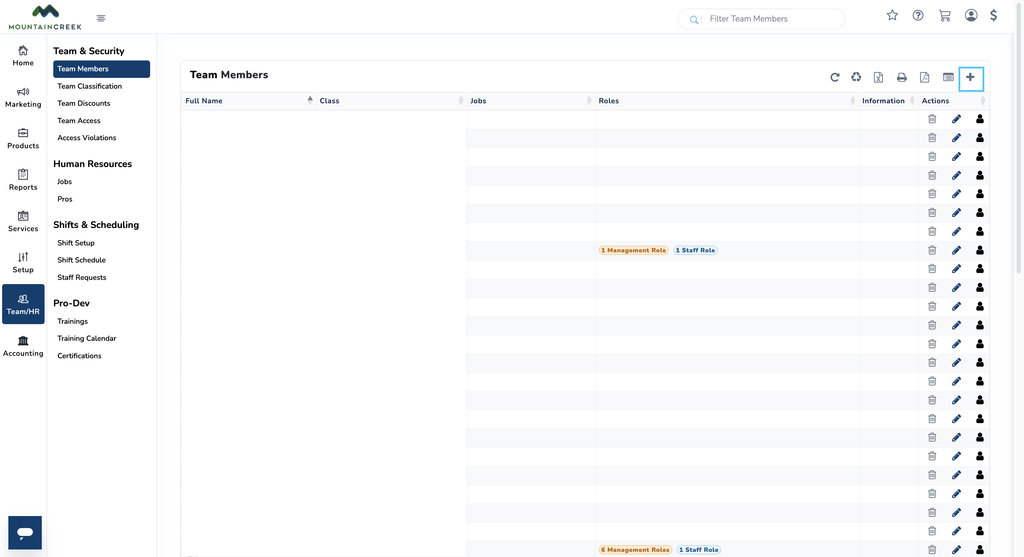
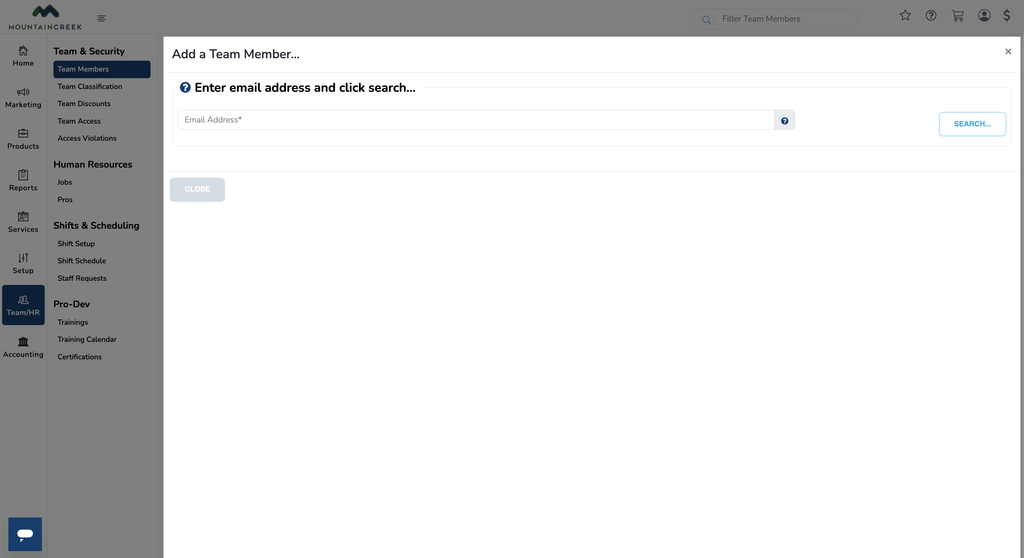
The team member will receive an email prompting them to sign up and set their password. Once they complete signup, their record will be available for editing under the Team Members menu.
EDITING TEAM MEMBER DETAILS #
After a team member has been invited, their full profile can be edited from the Team Members menu.
To edit a team member:
- Navigate to Team/HR → Team and Security → Team Members
- Search for the team member by name or email
- Open their profile to edit
Personal Information #
The following personal fields can be updated:
- First Name
- Last Name
- Email Address
- Date of Birth
- Phone Number
Employee Information #
The employee information section ties the team member to their position in the system:
- Classification — assign the team classification created in the Creating a Team Classification section. This determines the team member’s position and base permissions for the frontline Operator App.
- Employee ID / Employee Number (if applicable)
- Date of Hire
Roles & Permissions Adjustments #
At the bottom of the profile, individual Roles and Permissions can be adjusted for the team member. Use this section when a team member needs functionality beyond what their assigned classification provides.