
 AI Document Summary

This document covers the back-end portal workflow for building activity-based products, packages, and publishing them to the eStore. It walks operations and customer success teams through creating activity shops, access ages, access entitlements, tickets and passes, product packages, and inventory.
Navigating the Portal Menu #
The left-side menu contains all manager functions in the portal. Each top-level section expands into a navigation menu with additional options.
For this workflow, you will move between two top-level sections:
- Setup — for creating activity shops, ages, and access entitlements
- Products — for creating tickets, passes, packages, and managing inventory
Note for operations teams: Build each component in the order listed in this guide. Tickets and passes depend on access entitlements, packages depend on tickets and passes, and inventory depends on all of the above.
Creating an Activity Shop #
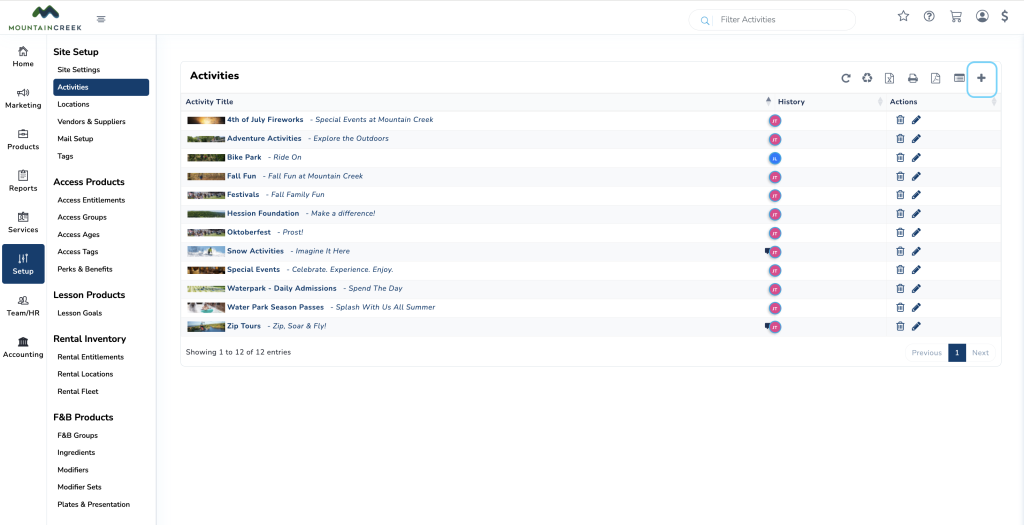
An Activity Shop is a container that houses all products tied to a specific type of activity. Each shop can be configured to fit the activity it supports.
Examples: a Snow Activities shop to house snow-based products, or a Water Park Activities shop to house water park products.
To create an activity shop:
- From the left-side menu, select Setup
- Under Site Setup, select Activities
- Press the plus (+) button in the top-right corner
- Fill in the activity shop details
- Select Save
The shop is now available to house products created in the steps that follow.
Creating Access Ages #
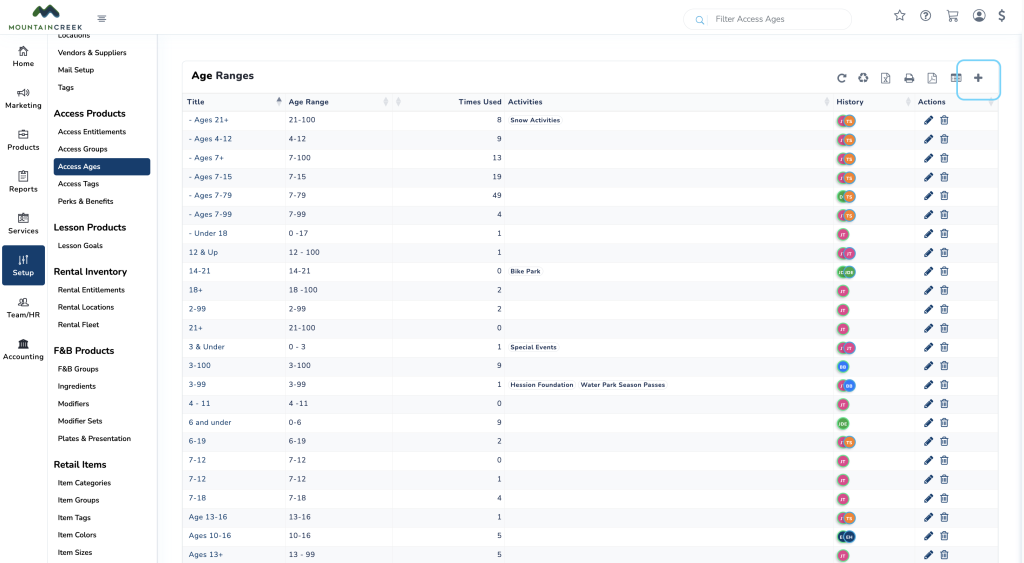
Access Ages define the age ranges that products will be associated with. These ranges drive pricing tiers and product eligibility.
To create an access age range:
- From the left-side menu, select Setup
- Navigate to Access Products and select Access Ages
- Press the plus (+) button in the top-right corner
- Fill in the following fields:
- Title — the display name of the age range (for example, Ages 21+ or Ages 6 and Under)
- Age Range — enter the numeric range (for example, 21–100 or 0–6)
- Activity (optional) — associate the age range with a specific activity to further categorize it
- Select Save
Creating Access Entitlements #
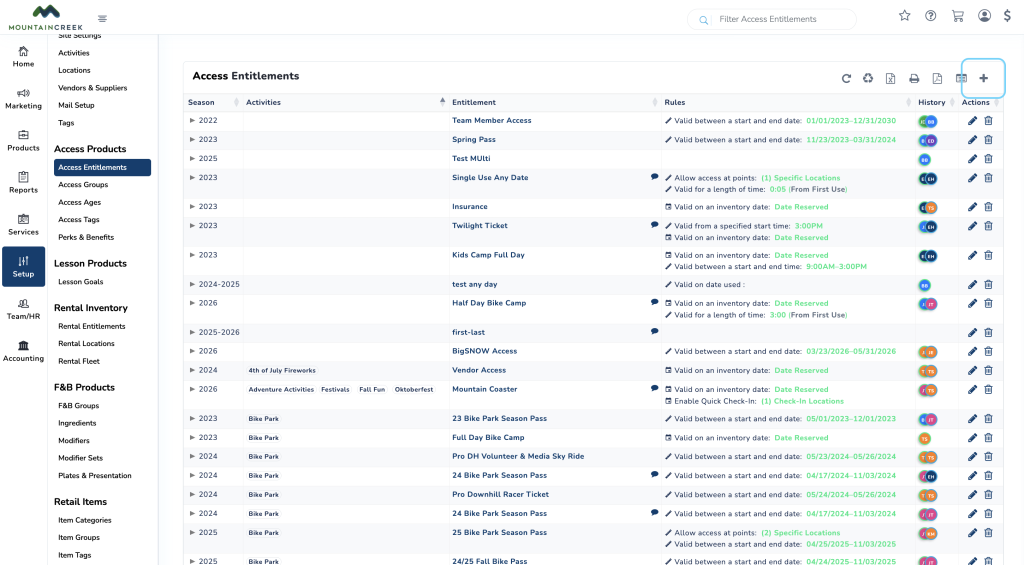
Access Entitlements define how a product will function — what it is entitled to and when those entitlements are valid. Entitlements are the rule set that will eventually be attached to tickets and passes.
To create an access entitlement:
- From the left-side menu, select Setup
- Navigate to Access Products and select Access Entitlements
- Press the plus (+) button in the top-right corner
- Fill in the following fields:
- Season
- Activities
- Entitlement Name
- Includes — number of uses, if limited
- Description
- Select Create
Once the entitlement is created, you will be brought to a configuration screen where specific rules can be added.
Examples of entitlement rule configurations:
- Spring Pass, Season 2023: Valid between 11/23/2023 and 03/31/2024
- 10 Day Bike Pass, 2026: Invalid 04/25/2026–04/26/2026 · Valid between 9:00 AM–6:00 PM · Access limited to specific locations · Valid 04/20/2026–05/20/2026
Important: Rules stack within a single entitlement. Confirm all date, time, and location rules are configured correctly before attaching the entitlement to a product.
Creating Tickets and Passes #
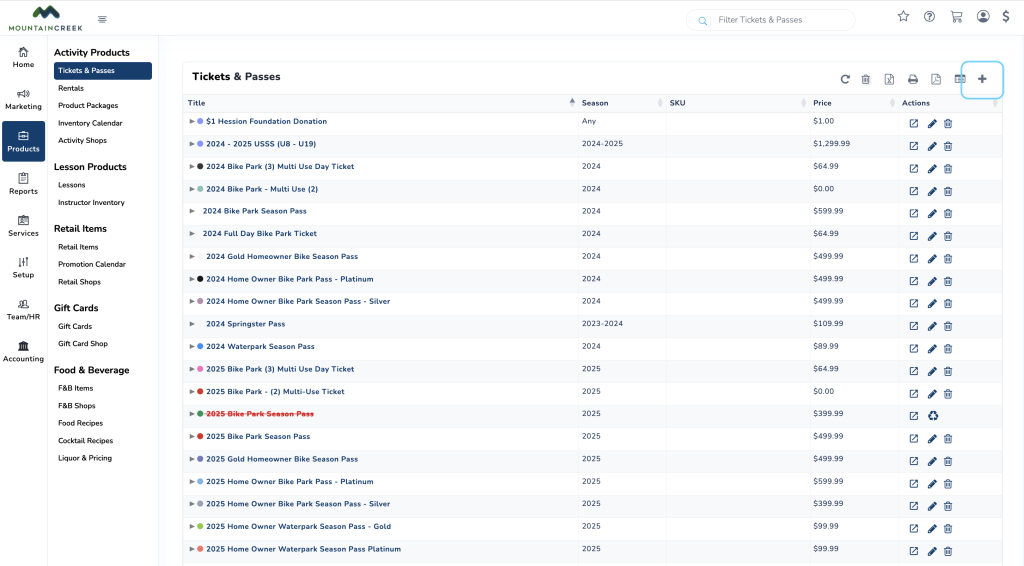
This step creates the actual ticket or pass product that will be sold inside an activity shop. Access entitlements created in Section 4 are attached here.
To create a ticket or pass:
- From the left-side menu, select Products
- Under Activity Products, select Tickets and Passes
- Press the plus (+) button in the top-right corner
- Fill in the following fields:
- Name
- Season
- Activities
- Accounting Classification
- Group
- Ages
- Price
- Select Save New Item
After saving, you will be brought into the created ticket or pass, where you can:
- Attach Access Entitlements
- Attach Discount Entitlements (if applicable)
- Upload product images to display in the shop
The ticket or pass is now a complete sellable product with its access rules attached.
Building Product Packages #
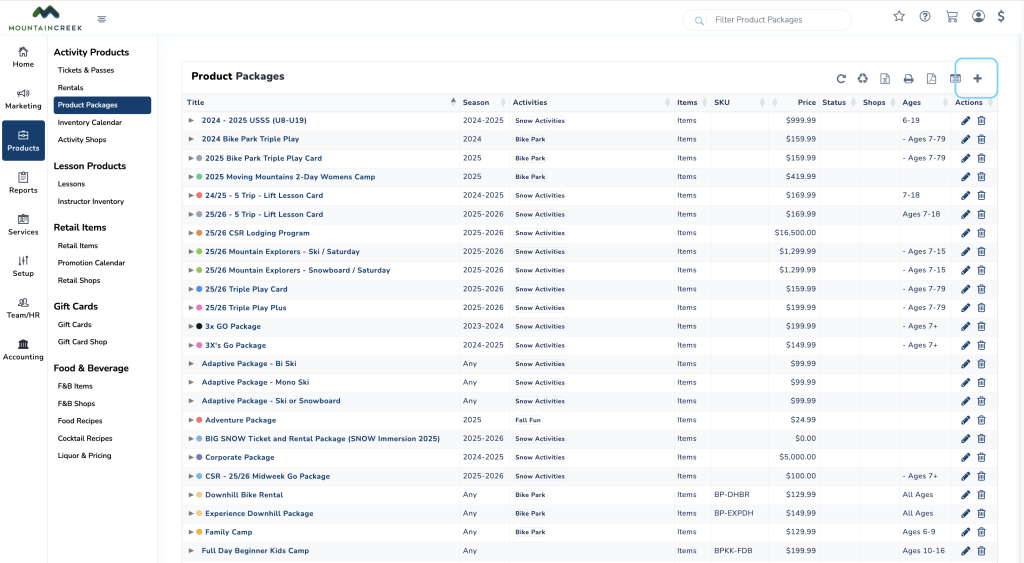
A Product Package combines two or more previously created tickets and passes into a single bundled product sold under one umbrella. A common example is a day ticket bundled with a day rental.
To create a product package:
- From the left-side menu, select Products
- Under Activity Products, select Product Packages
- Press the plus (+) button in the top-right corner
- Select the Package Type: Family, Individual, or Group
- Fill in the following fields:
- Package Name
- Activities
- Season
- Description
- Group
- Ages
- Price
- Select Create
After creation, you will be brought to a configuration screen to modify the package further.
Inventory Options #
Choose the inventory behavior that best fits the package:
- Inventory this package as a stand-alone product
- Inventory this package and reduce its inventory when the indicated package product inventory is less
- Display package when a different product’s inventory is available
- Display package when a shift inventory for a lesson product is available
Product Allocation #
Use the Product Allocation section to attach the previously created tickets and passes that make up the package. Each allocated product becomes part of the bundle.
For example, allocate a Day Ticket and a Day Rental together to create a Day Rental/Ticket package.
Adding Products to the Inventory Calendar #
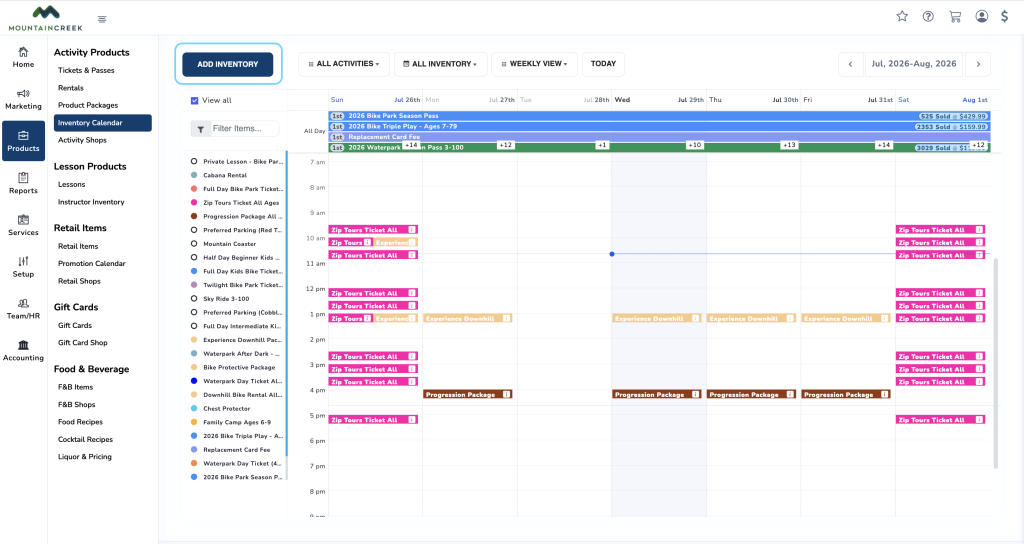
Once shops, ages, access entitlements, tickets and passes, and product packages are created, the final step is publishing them to the inventory calendar so they appear on the eStore.
To add inventory:
- From the left-side menu, select Products
- Under Activity Products, select Inventory Calendar
- Press Add Inventory in the top-left corner
- Select the inventory type:
- Single Day Use Products
- Multi-Day / Pass Use
- Single Day Use and Time
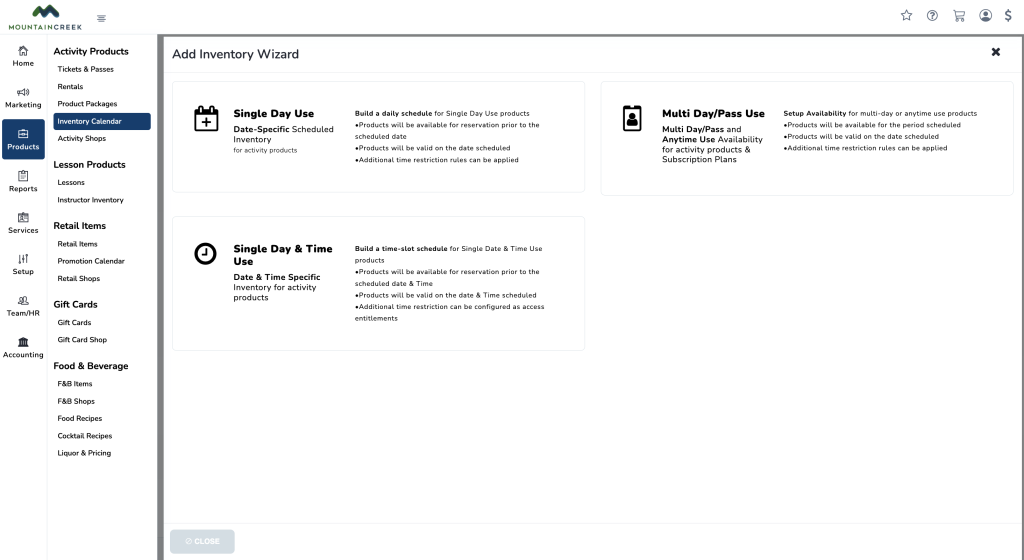
- Select the ticket, pass, or package from the list of created products
- Configure the following options:
- Discounts
- Quantity available on the eStore
- After Sold Rules — determine whether the product continues to sell after reaching the inventory cap or stops at sold out
- Select Save
Recurring Schedules #
The inventory calendar can also be configured to repeat a specific schedule on a daily basis. Use this option for products that follow a consistent availability pattern.
Once saved, the product becomes visible and sellable on the eStore according to the inventory rules configured.