
 AI Document Summary
This document covers the setup workflow for SnowPay, SnowCloud’s built-in payment processing system powered by Stripe. Before an operation can accept payments through SnowCloud, SnowPay must be set up and a bank account linked.
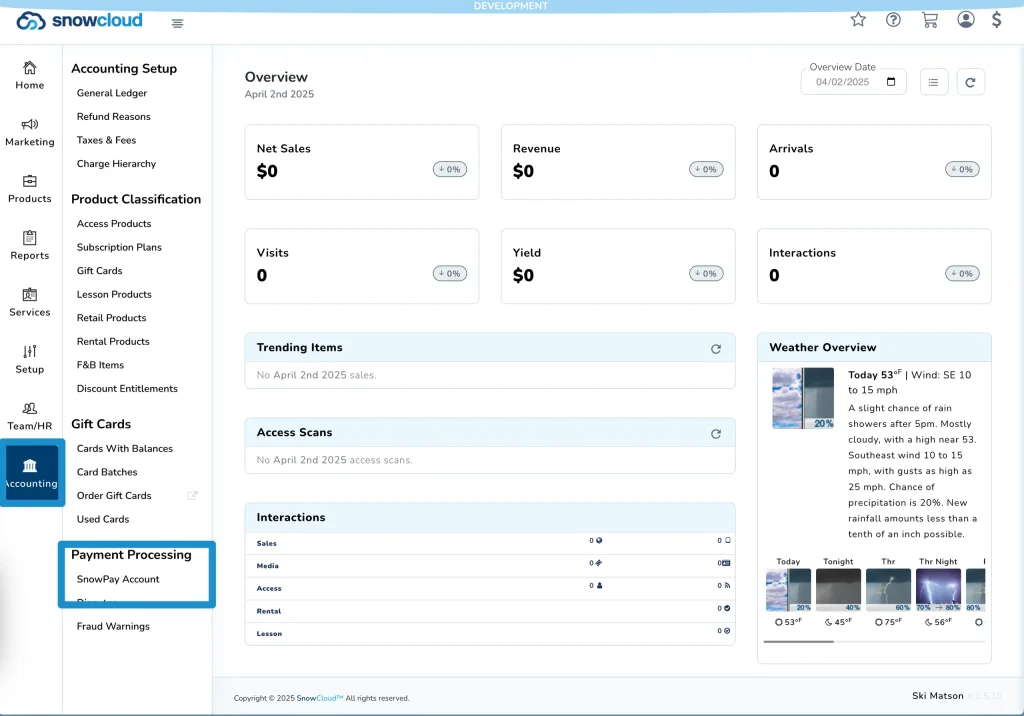
COMPLETING THE SNOWPAY ACCOUNT SETUP #
To access and begin SnowPay setup:
- From the left-side menu, select Accounting
- Under the Payment Processing section, select SnowPay Account
- Select Begin to start setup
To complete the SnowPay account setup:
- Use the Country dropdown to select your country, then select Next
- You will be redirected to Stripe — use the Type of Business dropdown to select your business type, then select Continue
- Complete the required business information fields, which may include:
- Legal Business Name
- Tax ID
- Address
- Select Continue to proceed
- Enter your Website, then select Continue
- Review all information provided
- Select Agree and Submit to complete the account setup
ADDING A BANK ACCOUNT #
After completing the initial setup on Stripe, you will be returned to the SnowPay page in SnowCloud.
To add a bank account:
- Select Add Bank on the SnowPay page
- Enter your bank account information
- Select Save