
 AI Document Summary
This document covers the back-end portal workflow for creating and configuring waivers in SnowCloud. It walks operations teams through building a waiver, creating waiver versions, and using the document builder to design the guest-facing waiver form.
NAVIGATING TO WAIVERS #
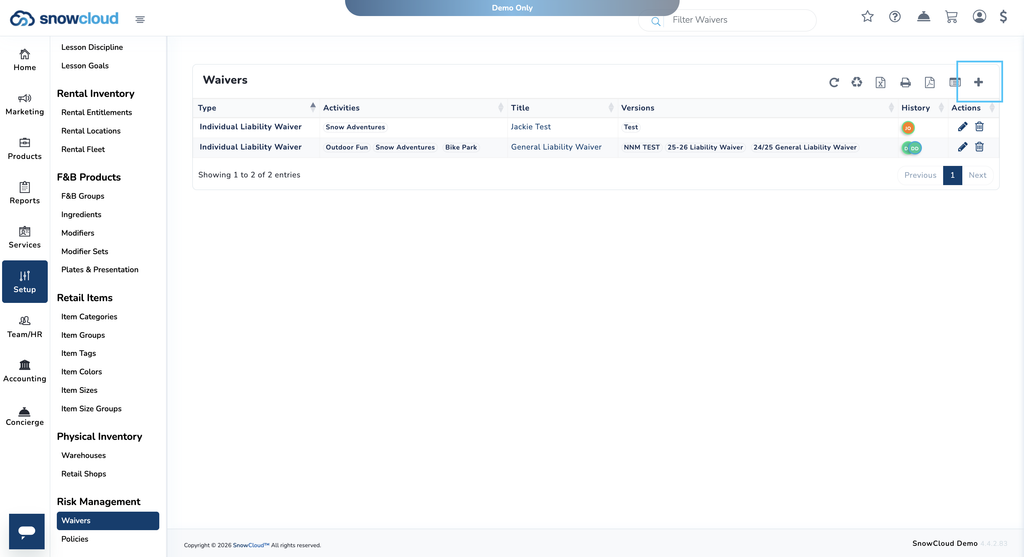
To navigate to Waivers:
- From the left-side menu, select Setup
- Under Risk Management, select Waivers
CREATING A NEW WAIVER #
To create a new waiver:
- From the Waivers page, press the plus (+) button in the top-right corner
- Select a Waiver Type — options include:
- Lesson Product Waiver
- Individual Liability Waiver
- Purchaser/Party Liability Waiver
- Individual Rental Waiver
- Enter a Waiver Title
- Select the Waiver Activities — this links the waiver to one or more activity shops
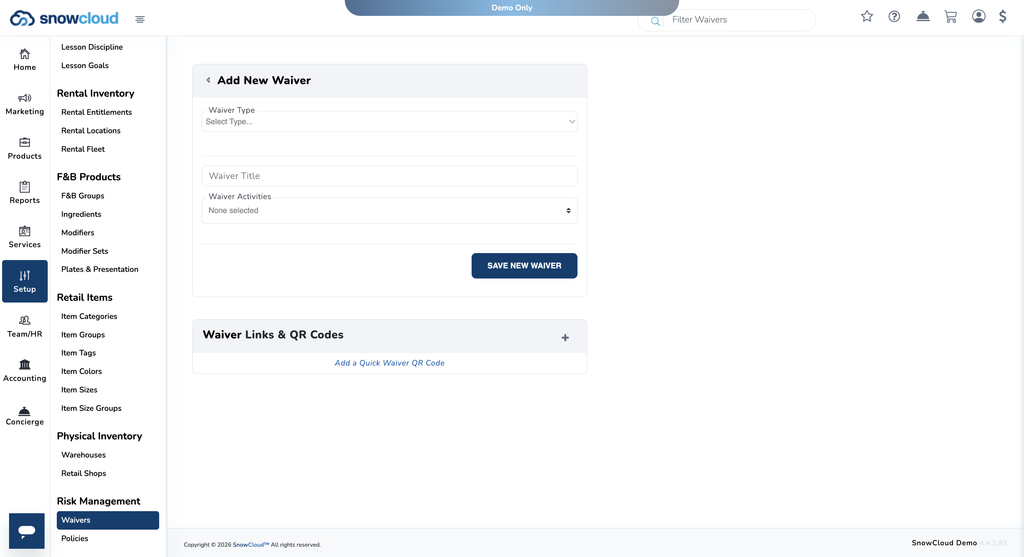
Waivers are linked to an activity shop, not to individual products. Any product within the linked activity shop will prompt this waiver at checkout. A single waiver can also be linked to multiple activity shops.
- Select Save New Waiver
WAIVER CONFIGURATION SCREEN #
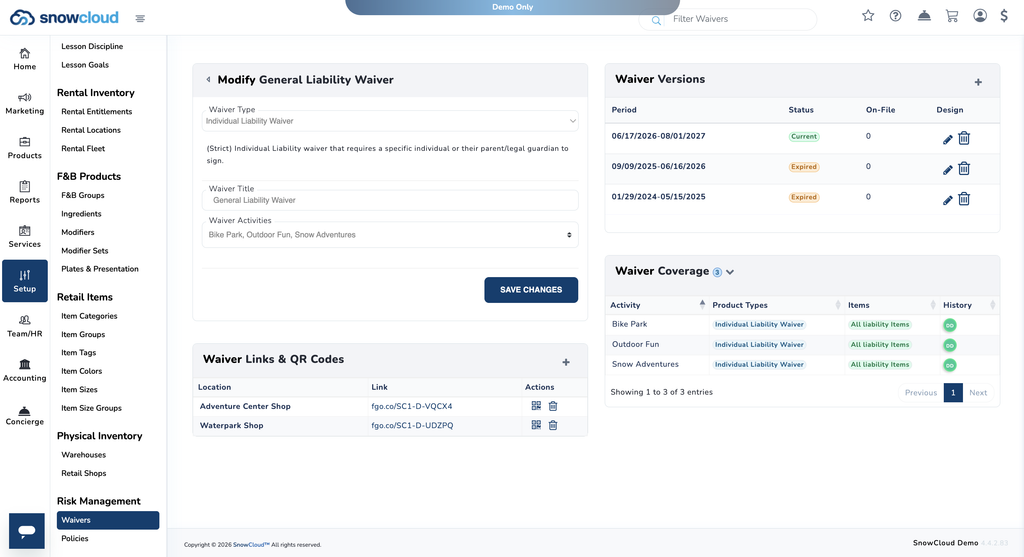
After saving, you will be brought to the waiver configuration screen. This screen displays:
- Waiver Coverage — the activity shops the waiver is currently linked to
- Waiver Versions — a history of all versions created for this waiver, each with its own active date range
CREATING A WAIVER VERSION #
Waiver versions allow you to manage different iterations of a waiver over time, each tied to a specific validity window.
To create a new waiver version:
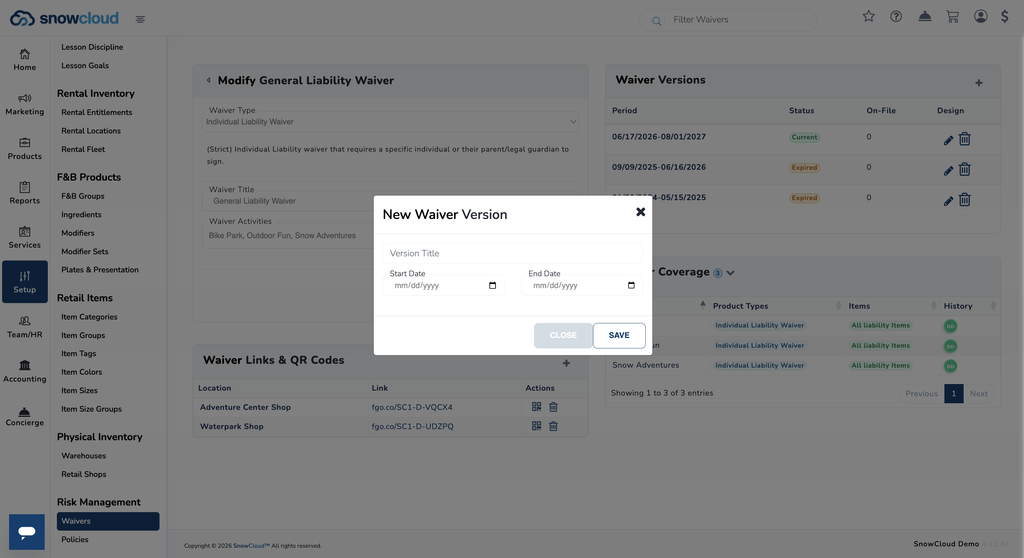
- From the waiver configuration screen, press the plus (+) button in the top-right corner of the Waiver Versions section
- Enter a Version Title — typically the date range the waiver will be active (for example, 09/01/2026–03/31/2027)
- Enter the Start Date and End Date
- Select Save
You will be brought to the waiver document builder.
BUILDING THE WAIVER DOCUMENT #
The document builder is where the guest-facing waiver form is created. Content is added in the following order:
- Document Header — enter the header text for the waiver in the provided text box
- Document Body — enter the full waiver text and legal excerpt
- Signature Checkboxes — add signature checkbox fields wherever acknowledgment is required
Once the document is complete, use the device orientation previews to confirm how the waiver will appear to guests on mobile, tablet, and display monitor orientations.
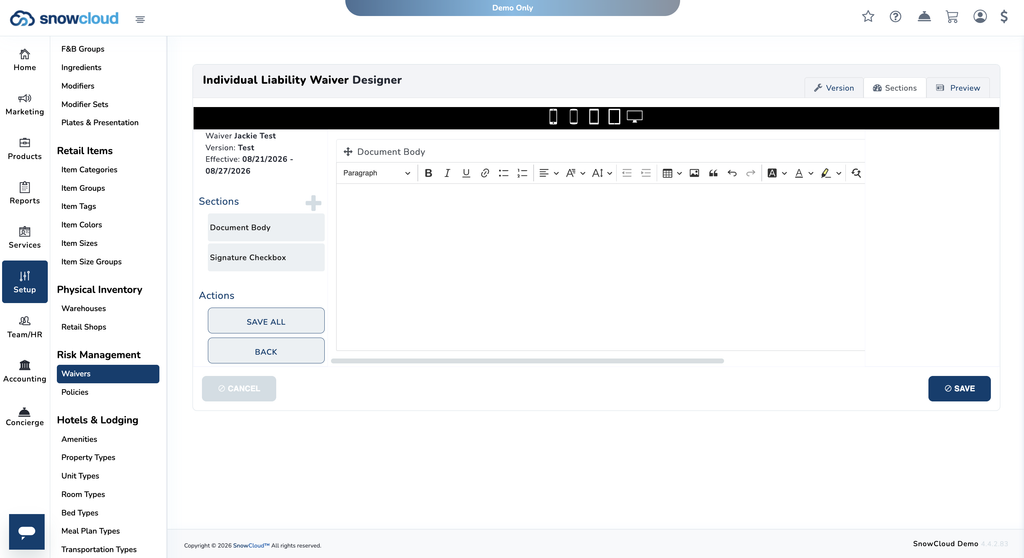
When satisfied, select Save All to finalize the waiver version. The version is now active and tied to its linked activity shop for the configured date range.